Interact Quiz Maker

How To Create A Quiz With Interact Quizzes To Grow Your Email List

This post contains affiliate links, which means I may earn some commission if you click on one and make a purchase.

Tired of the same old when it comes to list-building?

Checklist. Done

Video series. Done

E-book. Done

Masterclass. Done


The goal of a lead magnet is to provide value to your prospects in exchange for an email address.

Once these new prospects have entered your world, you continue to nurture them through various email marketing campaigns with the goal to better understand their pain-points and how to better serve them.

As a digital marketing strategist, I help my clients get found online and build out their lead generation funnel. I am regularly asked “What should I create to attract prospects?” and am always on the lookout for new ways to do so.

I started looking into different options and better ways to serve my clients and came across quizzes.

What I discovered is that quizzes can be a great addition to your strategy as they allow you to get to know your audience, their pain-points and then customize a solution for them.

I started to look for solutions to implement my quiz and came across Interact. Interact is a tool for creating online quizzes that generate leads, segment your audience, and drive traffic to your website.

Since I provide Done For You Facebook Ads Management as well as a DIY membership, I knew I wanted my quiz to be related to Facebook ads in some way.

Much of my current audience wants to run ads but are not sure what approach to take- through my quiz I wanted to help guide them to the right option for them.

Setting up my first quiz with Interact was really easy as they made the process very straightforward.

In this post, I will walk you through the steps I took to create and launch my first quiz with Interact and how you can get started as well.

What type of Interact quiz will you create?

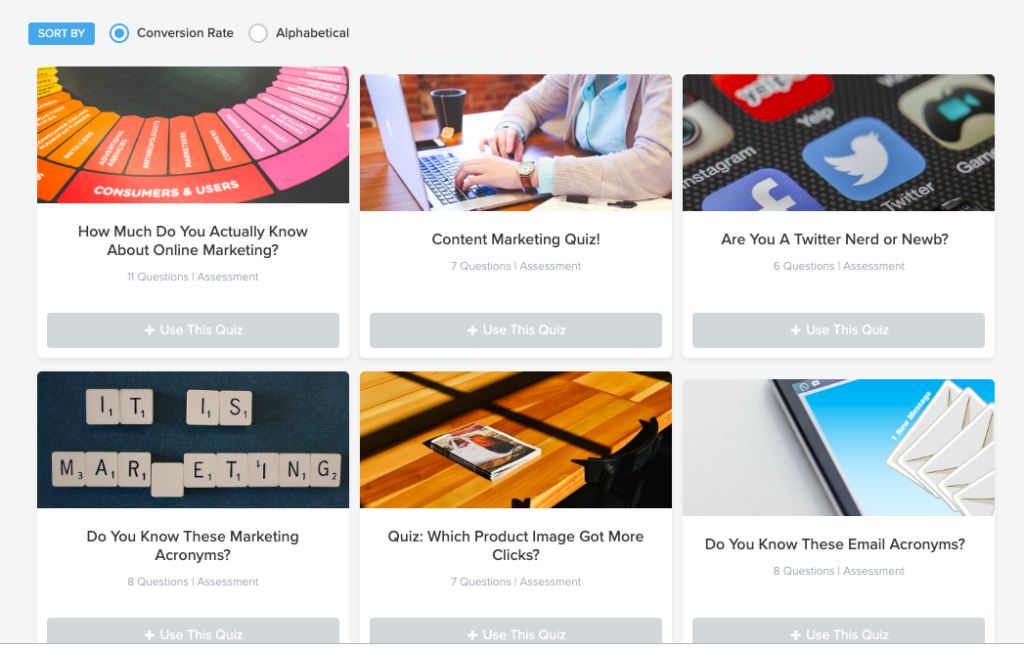
When getting started you have the option to choose a template or create a quiz from scratch.

Interact Quizzes

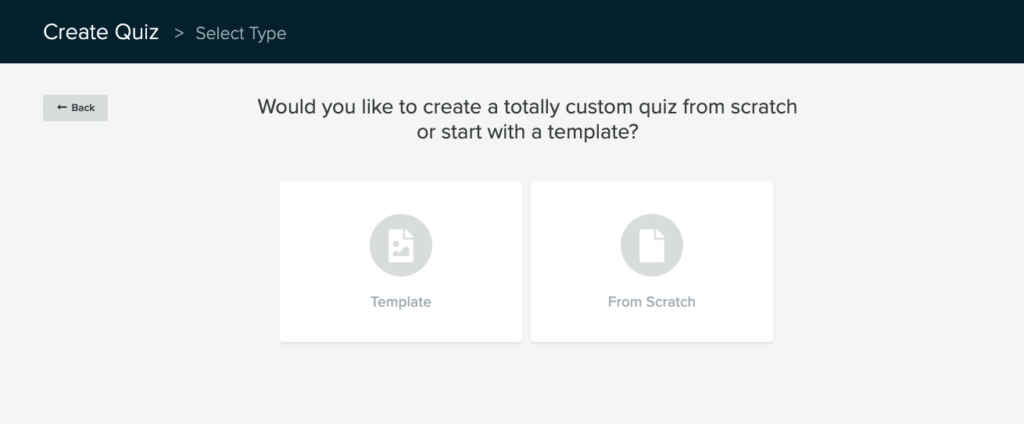
I chose existing template.


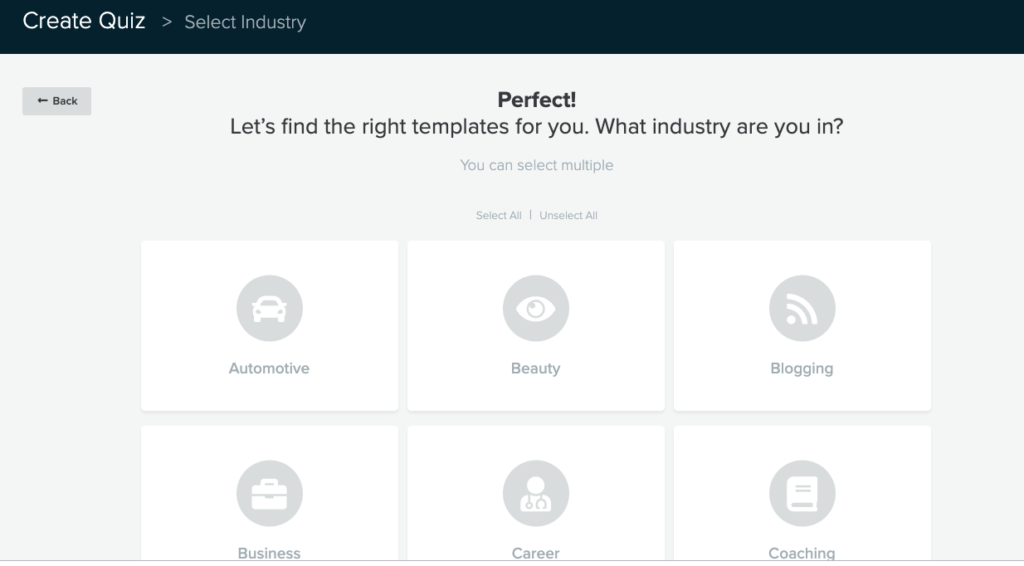
And then Marketing as the industry.

From there I had to choose which type of quiz I was going to create.


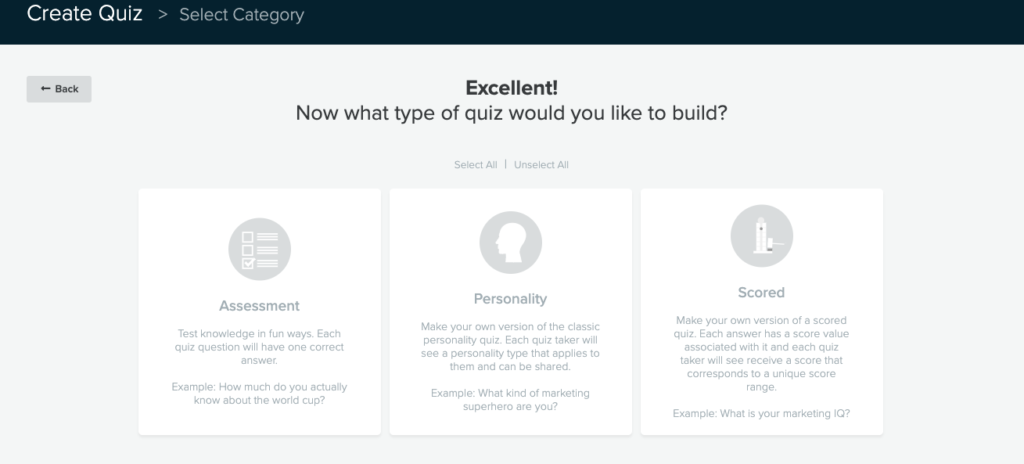
Interact allows you to choose from 3 different types.

Assessment: Each quiz will only have one correct answer and at the end, the user will get a score out of the total amount of questions you have.

Personality: Make your own version of the classic personality quiz. Each quiz taker will see a personality type that applies to them and can be shared.

Scored: Make your own version of a scored quiz. Each answer has a score value associated with it and each quiz taker will see receive a score that corresponds to a unique score range.

I chose personality type of quiz because I wanted to give people a specific result based on how they answered questions about Facebook.

They have a large number of templates with example questions and images so you can quickly get started.

Editing your quiz template

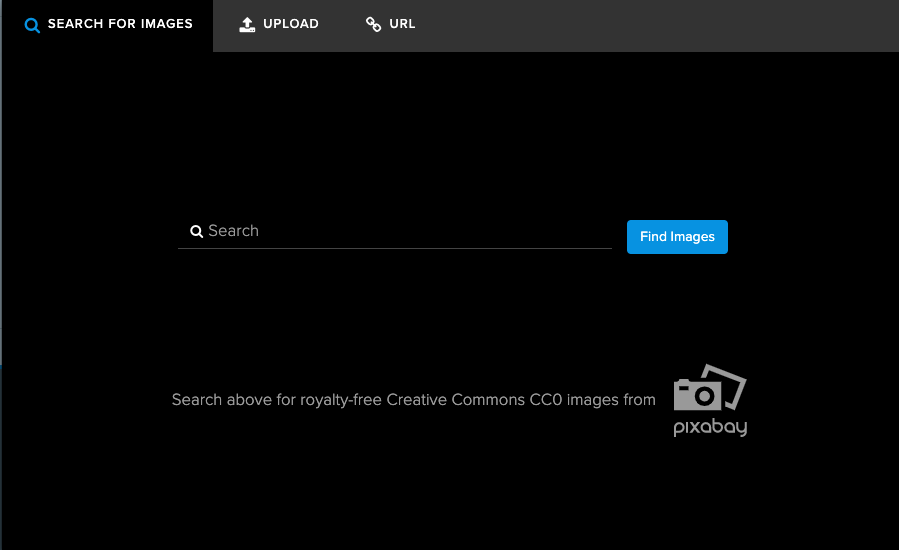
Once you choose your template, you now have the option to edit the title, image and colors.

I chose an image from Pixabay from within the cover section.

Interact Quiz Maker

Editing results

The next section to work on is your results section. This section is where you will define the various ‘personalities’ and results your quiz taker will end up with.

use quizzes to generate leads for your business

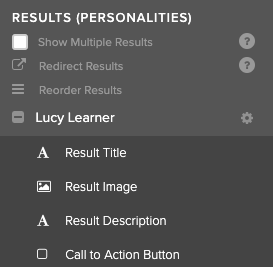
For each result, you want to customize the screen that people will see once they have completed the quiz. Here is a completed results page with an image, description and call to action. You can also remove the image if you would like. In the image below, I have customized the call to action button with my brand colors and included a specific call to action.

how to use quizzes to generate leads for your business

Repeat this step with each personality result for your quiz.

Creating your questions

The next step is to create the questions in your quiz. I chose to have six questions in my quiz but you can have more or less if you would like. I would recommend 6-8 questions to keep your prospect engaged and increase the chances of completion. You can choose to hide the image or add an image if you would like.

Interact Quiz maker

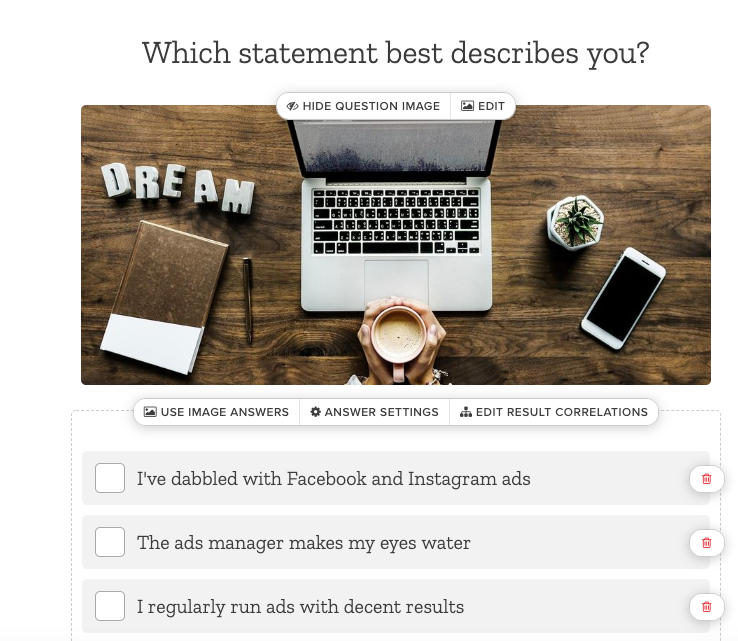
After you’ve created your questions, it is time to connect your questions to the results.

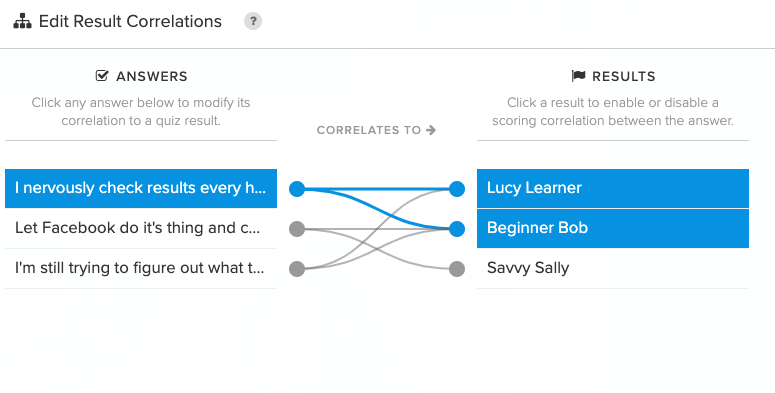
At the top right of your screen, you will see “Edit Result Correlations” and then you will be taken to a page like this:

Interact Quizzes for lead generation

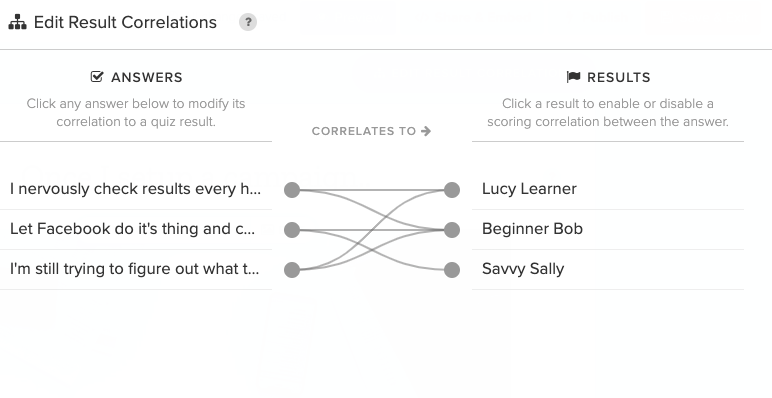
To connect an answer to a result, click on the circle next to the answer and then the result you want it to correspond to.

Interact quiz

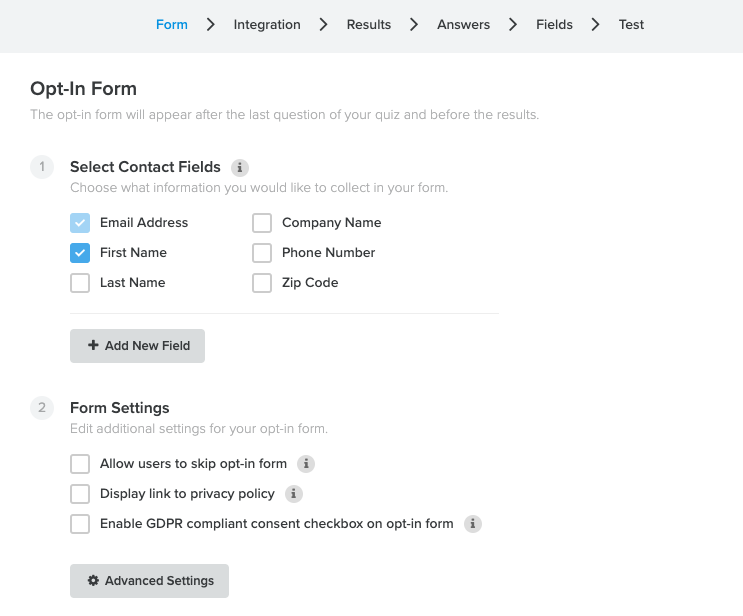
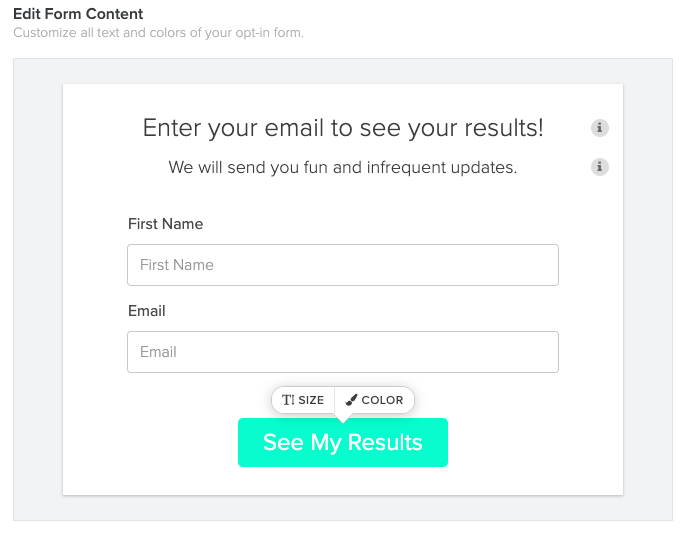
Once you’ve completed all the correlations, it’s time to setup your opt-in form and connect your quiz to your email service provider. Here you can select the fields included in the opt-in form and whether or not they can skip the opt-in and see the results.

Interact quizzes

try Interact quiz maker

Once you’ve completed the opt-in form setup, it’s time to connect your email marketing service provider.

use Interact quizzes to generate leads

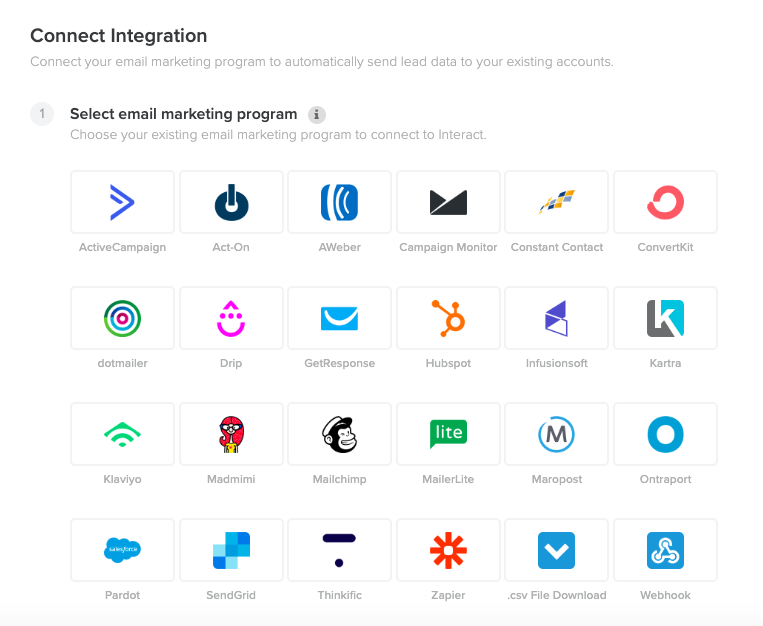
I use ConvertKit as my email marketing service provider, so all I had to do was select ConvertKit and then enter the API key and API secret. (Note: In ConvertKit, I had setup different sequences based on the results obtained.)

Once Convertkit is setup, you’ll be taken to a screen like this:

Interact quiz maker

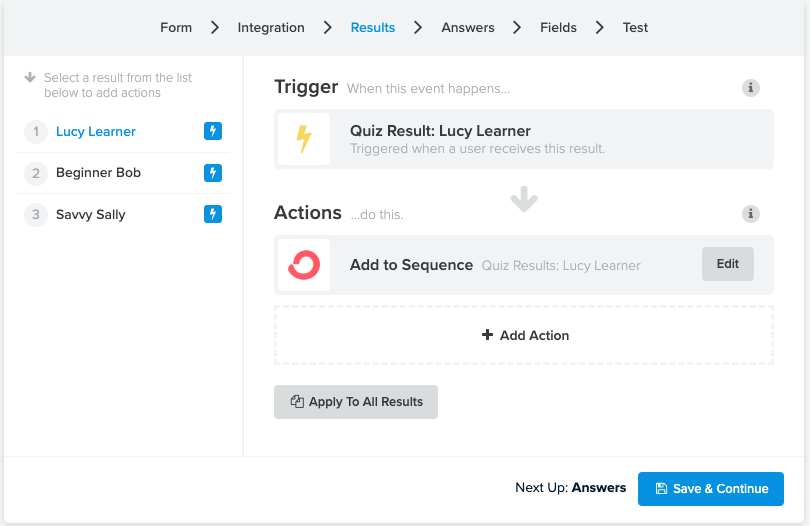
where you map the trigger to the action to take.

Publishing your quiz

Once you have completed your quiz, you can select ‘Publish’ on the top right hand of your screen. There are then several options to sharing your quiz.

Interact Quiz maker

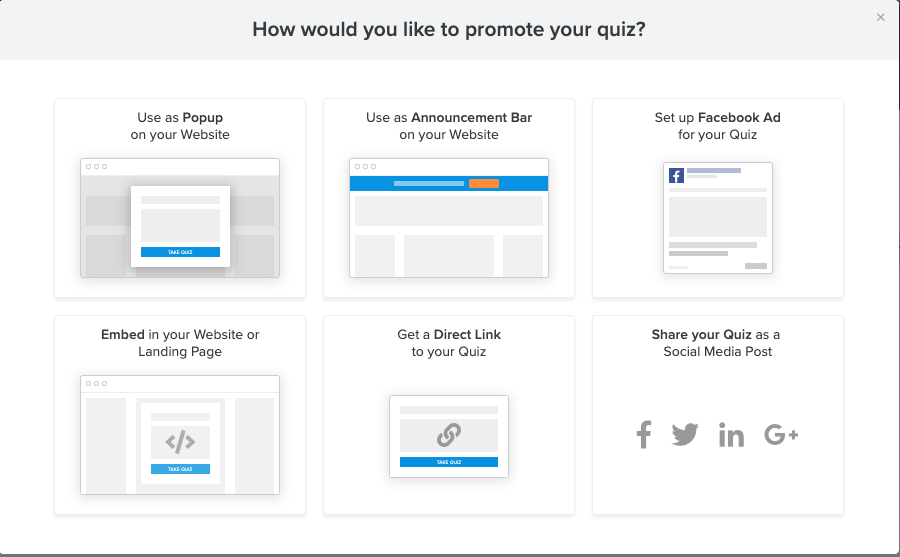
You can choose to embed the quiz directly on your site by copy and pasting the embed code in a new post or page on your website. You could also share a direct link to your quiz or share a direct link to your quiz.

Using the step by step process outlined by Interact, I was able to easily create my first quiz in under an hour. 

Once the quiz is complete, now the fun begins. Time to share it with the world!

Promoting your quiz


Here are some of the ways that I promoted my quiz:

  • Shared it with my existing email list
  • Posting it in Facebook groups
  • Pinterest pin
  • Created an Instagram story
  • Created an Instagram post

Ready to create your own Interact quiz?

You can get started with your first quiz from $17/month and each plan includes a free 14 day trial which should be enough time to create and test out your first quiz.

Conclusion

Interact makes setting up quizzes fun and seamless. What I really like about quizzes is the ability to segment my audience based on their responses and further understand my customer avatar. Using Interact quizzes combined with ConvertKit, I am now able to email my subscribers with content better suited and targeted to their needs.

For business owners, quizzes are a great tool to add to your marketing toolkit and connect with your audience in a whole new way.

You can see an example of my quiz below and start your free 14 day trial today!

How To Use Show and Tell To Book Discovery Calls

Today I want to take you briefly down memory lane…all the way back to Kindergarten!

(Yes, I’m going waaay back but you’ll see why it all makes sense in just a bit!)

Show and Tell.

Remember when you were asked to bring in your favorite toy/book/ and show it to your classmates and talk about it? And everyone would ooh and ahh?

Well, that works in business as well.

Instead of just talking about what you do to potential clients- why not show?

That could look like:

  • Doing a video walkthrough of your membership site (people love behind the scenes)
  • Demoing a product you sell and how to use it
  • Showing how you do something (designing a logo, setting up an ad campaign, making a recipe, prep for a consult)….

And while you’re at it…tell them what’s next. What should they do?

  • Go here to learn more
  • Sign up for a call
  • Download …

Because I’m always testing what I share here, I recently did my own “Show and Tell” and booked 22 discovery calls in 2 weeks!!

And it didn’t require many moving parts. Here’s what I did:

  • Recorded a screen-share of how I run an ad campaign for my spa/chiropractor/gym clients that gets results
  • Uploaded video to Facebook and created ad (but you could always try just to your page first)
  • Call to action was to book a call and linked to my online scheduler such as Calendly, Acuity(affiliate link).

And the really great thing about this? People are coming on the calls ready to discuss next steps. They have seen what you do and already have questions about how it can work in their business.

There you go! Super simple, nothing fancy required!

What do you think? Is this something you will try?

Want do discuss your Show and Tell strategy? Book a free 20 minute consultation.

lowerfacebookadcost

3 Ways To Lower The Cost Of Your Facebook Ads

You’re ready to do your first Facebook ad but you also don’t want to break the bank. In this short video, I walk you through 3 ways to lower your Facebook ad costs.

One of the questions I get asked often is how can I use Facebook ads to grow my list.
I like to look at what you already have and see how we can use that to reach your goals. For example, do you have an email list? Facebook page? Blog? All of these can help lower your costs.
Often what I will see business owners do is simply create an ad by targeting other pages as interests and hoping for the best.
Targeting with interests does work but before reaching a cold audience that might not know you, it’s best to work with a warm audience who might already be familiar with you but not necessarily on your list.
If you want to lower your costs, you want to target people who may already be familiar with your brand or are similar to people who like your page or are on your list.


1. Create A Custom Audience
On Facebook you can create custom audiences and then target those custom audiences.
For example, you could upload your mailing list and then have Facebook create a ‘lookalike’ audience that is similar to your mailing list and serve ads to that audience.


2. Grow Your Page Likes
While it may seem counter-intuitive since organic reach of posts on Facebook Pages have gone down, paying for likes will cost less than trying to target a cold audience and have them directly opt-in to your list. What you can then do is setup an ad that is only shown to people who have liked your page and exclude people who may already be on your mailing list (by using the custom audience you created in point 1). With this method, you could setup an adset that is continually growing your page and your list at the same time.


3. Retarget Website Visitors
Remember that pair of shoes you looked at on Amazon and next thing you know that pair of shoes is following you around the web? That’s retargeting. Thanks to the Facebook Pixel you can do the same thing! By creating a custom audience of website visitors, you can serve ads specifically to people who have visited your website. This warm audience will be people who are familiar with you because they read a blog, looked at your sales page or maybe visited your optin but never signed up and you have an opportunity to get in front of them with a targeted ad.
Set your Facebook ads up for success. Get the free training here.

FacebookFoundation

how to promote your webinar free

7 Free Ways To Promote Your Webinar, Challenge or Lead Magnet

So you’ve decided to host a webinar and now it’s time to promote it and get people to sign up.

In addition to paid advertising such as Facebook, Instagram, LinkedIn or Pinterest ads to reach your target audience, there are also free ways you can use in your webinar marketing strategy.

Note- these same tips could be applied to promote a challenge or your lead magnet.

1. Hello Bar 

Hello Bar runs across the top of every page of your website (free version) and it’s a great way to draw website visitors attention to your webinar or challenge

Screen Shot 2016-02-13 at 3.43.55 PM

2. Side Bar 

Use the space available on the side of your website to promote your webinar or challenge with an image linked to the landing page sign up.

3. Existing Content

Look at your most visited blog posts in Google Analytics (related to your topic) and add a call to action within the post and at the bottom of the post.

4. Create a Facebook event

And invite specific people (be selective and don’t just invite your entire friends list) to your event. Also, make sure to set the event as public so when people join it will be shared on their newsfeed.

5. Social media Cover Images

In this example, Dr. Lesly Devereaux has changed her Twitter header (and Facebook) to bring attention to an upcoming workshop.

use your social media headers to promote your lead magnet

6. Blog on LinkedIn (or Medium)

If your target audience is on LinkedIn,  create a blog post  about your upcoming event/workshop/challenge. You can reuse existing content but make sure to include specific a specific call to action. promote your webinar on linkedin7. Periscope Daily 

Use Periscope to share tips leading up to your webinar with a specific call to action (“Sign up for the webinar here”), “Get my free tips here”). Make sure to create a short URL so it’s memorable and so you can track conversions.use periscope to promote your freebie

And there you have it, 7 easy and free ways to promote your upcoming webinar. Which ones will you be trying? Share in the comments below!

run your first webinar

How To Run Your First Webinar In 6 Easy Steps

Given all the choices we have to market our business online using social media such as:

  • Twitter

  • LinkedIn

  • Facebook

  • Pinterest

  • Blogging

  • Instagram

  • Livestreaming (Periscope, Meerkat, Facebook Live)

and many more… Why add webinars to the mix?

Don’t get me wrong- I love social media!

However, when it comes to growing my reach and building the know/like/trust factor nothing compares to webinars or a live training.

Webinars have so many benefits:

  • Share Expertise

Hosting a webinar is a way to get in front of your audience and educate them about what you do.

For example, if you are a health coach you could do a webinar on ’10 Ways to Detox in Spring’.

Similarly, if you are a website designer, you may decide to present on the ‘6 Website Tweaks to Get More Traffic’.

Or if you are a copywriter, you could talk about ‘The 3 Steps To Writing A Killer Sales Page That Converts’

Not sure what to talk about? What do you get asked often about?

Your webinar should focus on educating- people should walk away with something tangible and the focus should not just be on selling.

Remember, it’s not an infomercial!

Think about what you get asked often and start making a list.

Pro Tip: Look at your Google Analytics and see which posts are getting the most visits and use that as a starting point.

Click Here To Get The ‘Webinar Technology Made Simple’ Guide

  • Promote Your Brand

You get to promote and broaden your reach on your own terms and when you want. You don’t have to wait for a guest post to be accepted and you get to decide how often and when you want to do them.

For instance, if you are planning a new product or service launch, you may decide that you want to do a webinar every week leading up to the launch.

It’s up to you to decide how often you want to do them and the format. For example, I run my webinars using Google Hangouts with slides but I could easily make them informal and just go live with my webcam and connect with my audience that way.

  • Broaden Your Reach

When I promote my webinars, I announce it to my mailing list and I also reach out to new audiences whether that is through sharing on social media, joint venture partners or Facebook ads. I use Facebook ads as they allow me to reach new people, very targeted and similar to my ideal client avatar. You could create one webinar and reposition who you are targeting that webinar to and offer it regularly as part of your marketing strategy. And you can reuse the content you create for your webinar in many ways! For example, you can turn into a blog post, make it available on your YouTube channel, or even make it available as an opt-in.

  • Get To Know Your Audience

Another advantage of doing a webinar is getting to know your audience. Because people are opting in for a particular topic, it allows you to gauge the interest level of that topic. Not to mention, webinars are an excellent way to have two-way communication with your audience as they are showing up live and you can engage with them with polls and live Q&A.

  • Lead Generation

 Webinars allow you to grow your list and potential leads in a very big way- not like a trickle which you may see through other forms like social media and blogging.

That’s why I’m excited about webinars because I know that by growing my list and building relationships with ideal client, I can learn how to better serve them. It is not just about growing my list and turning around and selling to them.

It’s an opportunity to get to know your community, get new people involved and because you are doing a webinar you have another reason to follow up. Additionally, it’s another opportunity to segment your list.

When I host a webinar, people get added to my webinar list as well as my main newsletter list. Then, if I have a specific offer related to that topic like my Webinar Startup Kit which walks you through setting up your first webinar, I can reach out to that specific list and follow up with that offer vs those who signed up for a different webinar.

To recap, through webinars you can  broaden your reach, get to know your audience, have a reason to follow up, and can customize and segment your offers.

How do you get started?

1. Decide on a topic

Not sure what to talk about? You could start by:

  • Surveying/Polling your existing audience and asking them what they specifically need help with.
  • If you have a newsletter opt-in, you could ask people when they sign up to reply and share their biggest painpoint.
  • Look at what questions your ideal client avatar is asking in Facebook groups and other forums where your ideal client hangs out.

It’s also important to look at how these topics and ideas tie back to your offerings. In terms of what works best in webinar format, think in terms of solutions and focus on the why. Your product or service, if you are offering one, would offer the how and go into more detail.

  • 6 Ways To Boost Your Website Traffic
  • 7 Ways To Increase Sales With Video
  • Goodbye Boring! How To Get Creative With Your Copy
  • Top Mistakes
  • Best Kept Secrets

Ultimately, it should tie back to what you have to offer. But…remember, people aren’t just joining your webinar to be pitched. Even if they don’t buy from you, they should walk away with value.

2. Pick Your Technology

This is where a lot of entrepreneurs get stuck because let’s face it- there is a lot of choice when it comes to choosing a webinar platform. There are a lot of different solutions you can use:

Personally, I’m a fan of the Google Hangouts based solutions as they are relatively straightforward to use and budget-friendly. Don’t get too caught up with the technology- pick one and practice!

You most likely already have a mailing list provider, so the easiest is to create a new list for people to opt-in to. You would then create a landing page which you would drive traffic to and share in different groups, communities. Depending on the solution you go with, you may also need to create an email reminder sequence.

Don’t let tech overwhelm stop you..it’s totally possible to master the technology, it just takes a little bit of practice.
Click Here To Get The ‘Webinar Technology Made Simple’ Guide

3. Create Your Presentation

I’m all about keeping it simple. If this is your first webinar, don’t pressure yourself to run a 90 minute webinar. Start small and work from there.

Typically, I structure my content as follows:

  • Kick off about 5-10 minutes before and welcome attendees and ask them to introduce themselves in the chat (2-4 min)
  •  Welcome/Agenda (2-4 minutes). Mention any freebie bonuses you will be giving away at the end
  • Introduce yourself: share your background, expertise, how you got where you are 4-6 min
  • Core Content: This is the meat of the webinar- share your how-to, what problem you are solving/your system, case studies (20-25 min)
  • Pitch: At around the 45 min mark, start talking about your product, how it solves the problem/painpoints, saves time. Share screen shots, walk through the purchase process (10-12 min)
  • Q&A have questions ready (10-12 min)

Note: you can go with less time or longer and scale the timing accordingly

4. Promote Your Webinar

Now that you have your amazing content- how do you get the word out about it?

  • Other People’s Audiences

I use the “Other People’s Audiences’” approach. I build my webinar audience by getting in front of other people’s audiences. I primarily use Facebook ads to promote my webinar to other pages that my ideal client avatar would like.

While this does involve spending money, I look at this as my marketing budget and consider it a valuable investment as I can get in front of new audiences.

  • Social Media

You don’t only have to rely on Facebook ads.  

I also share in Facebook groups and look at where people are talking about my particular topic and asking questions.

It does take time and effort but it is worth it because you get to have new people exposed to your ideas and who may resonate with what you have to offer.

  •   Mailing List and Joint Ventures

It’s also important to promote your webinar to your existing mailing list. Similarly, you can reach out to joint venture partners and see if your webinar material is a fit for their audience.

5. Practice, Practice, Practice

The women entrepreneurs I work with are ready for growth in their online business but the fear of making a mistake or messing up holds them back from making bigger moves online.

My response: it’s okay!

Everyone and I mean everyone makes mistakes.

You can practice and prepare and sometimes technology doesn’t cooperate.

When I first started running webinars, I would practice over and over and made sure I had everything right and now I am comfortable doing them. The key is practice!

Another fear- what if no one shows up live?

That’s okay because you have a recording. But you should look into why this happened: did you give enough lead time? was it the right day/time (for example, if your audience is the UK you probably shouldn’t run your webinar at 9pm PST).

6. Show-Time: Deliver awesome webinar & the follow-up

Or how to sell without feeling sleazy!

The key to profiting from your webinar is offering something of value to your audience. This may sound obvious but too many entrepreneurs focus on just educating but gloss over the actual sales part.

Through my webinars alone I have grossed several thousands of dollars in products, membership and sales of services.

I focus my webinar content on why entrepreneurs should do webinars but what I actually sell is the HOW (how to set up the technology, how to setup the landing page, the follow up sequence and so on) but this is not the primary focus of my webinar.

Throughout your webinar it’s important to mention and tie in your offering to your content and end your webinar with your pitch and a detailed breakdown of your product or service.

Pro-tip: Make sure to have questions ready for the Q&A period. Too often I see entrepreneurs ending abruptly after they pitch. Having q’s ready helps break the ice.

And don’t forget the follow up, just like you scheduled emails to go out to remind your list about the webinar, you also need to create a follow up email sequence.

And there you have it! Ready to run your first webinar?

Take Action Now

Click Here To Get The ‘Webinar Technology Made Simple’ Guide